GETTING STARTED WITH LINUX
There are currently two ways to connect to our VPN servers on Linux. You can choose between connecting via the terminal or using network manager. This guide is based on Ubuntu, and may differ if you use a different Linux distribution.
1 Download OpenVPN configuration files
Start by downloading the OpenVPN configuration files.
Download config filesExtract the folder that’s inside the zip file you downloaded to your desktop.
2 Terminal
Open a terminal window and install OpenVPN. You can do this by typing:
sudo apt-get install openvpn
When it’s installed open the terminal if you haven’t already, and you will be able to connect to the VPN by typing this command:
sudo openvpn --config path/to/location.ovpn
Change the path/to/location.ovpn to the location and path that you extracted the config files in. In this guide, when extracted to the desktop, the command line should look like:
sudo openvpn --config ~/Desktop/UDP\ 1194\ Normal/uk-lon-launchvpn.ovpn
Use the TAB key when typing the path so Linux will auto-complete the path for you! 3 Network Manager
You can also connect to our VPN by using Network Manager. You will first need to install the OpenVPN plugin for Network Manager using the following command:
sudo apt-get install network-manager-openvpn
If that doesn't work, try:
sudo apt-get install network-manager-openvpn-gnome
4 VPN Configuration
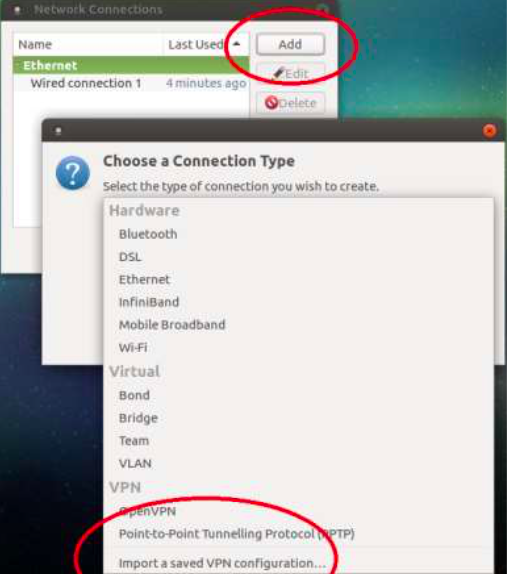
Now click Add and then click Import a saved VPN Configuration Open the location you want to connect to from the extracted configuration files that you downloaded earlier.

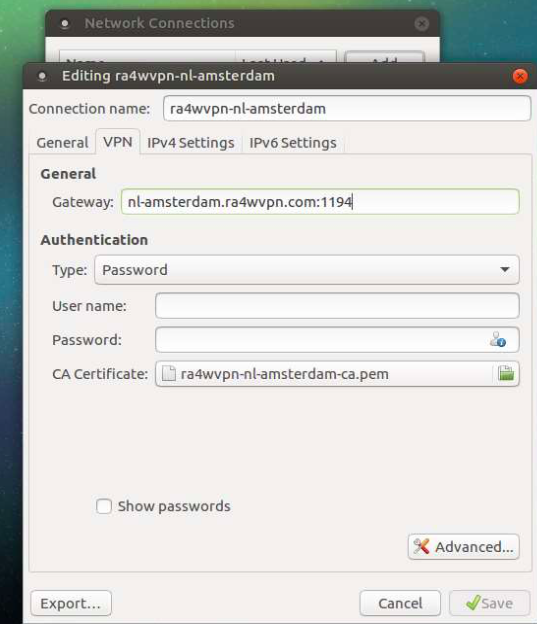
You should now have something like this:

Enter your LaunchVPN email and password. Click on Save to save the configuration.
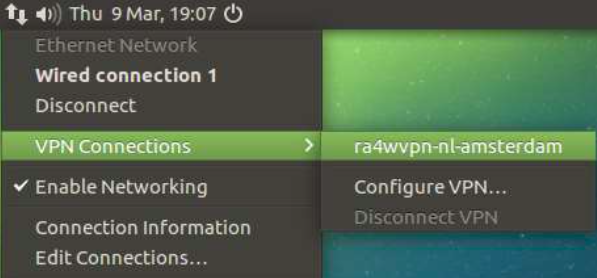
Now you can connect to the VPN server by clicking on the location in your Network Manager.

